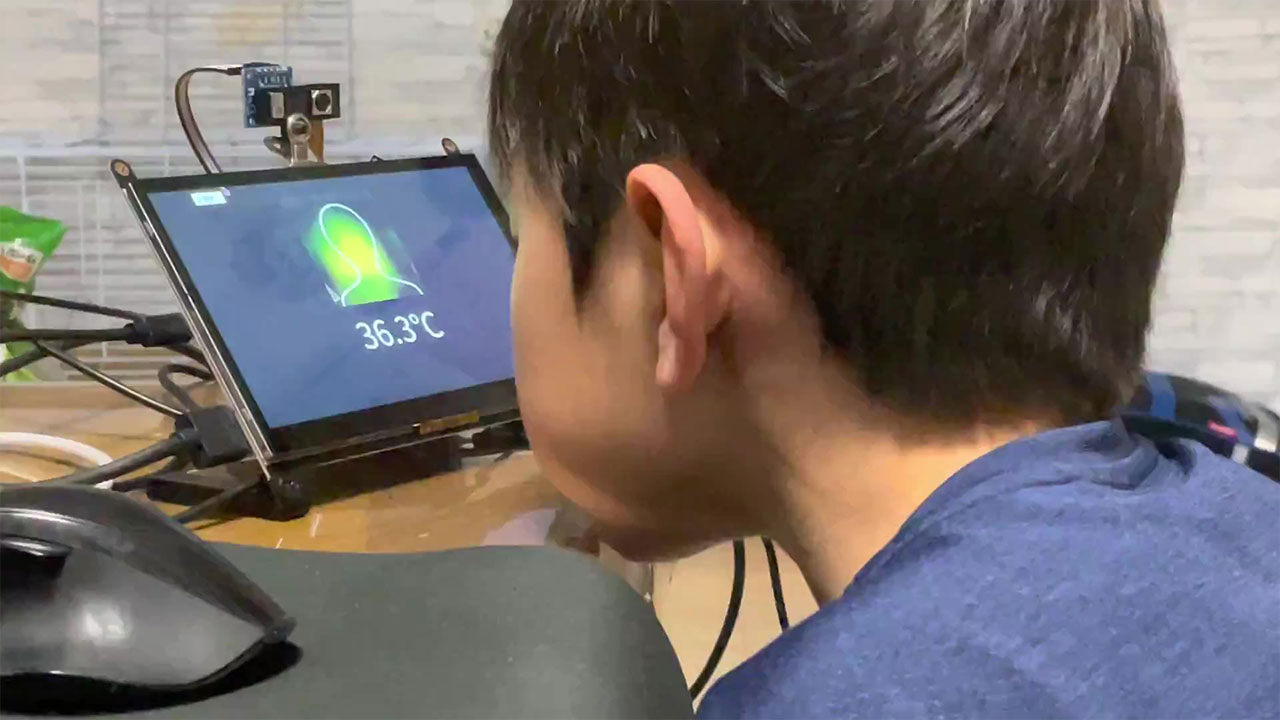
前回、サーモグラフィー「AMG8833」とWebカメラ「OV5640」モジュールを合体させ、サーマルカメラを作りました。今回は検温に使ったコードを記載します。サーモグラフィーとカメラ映像を重ねています。
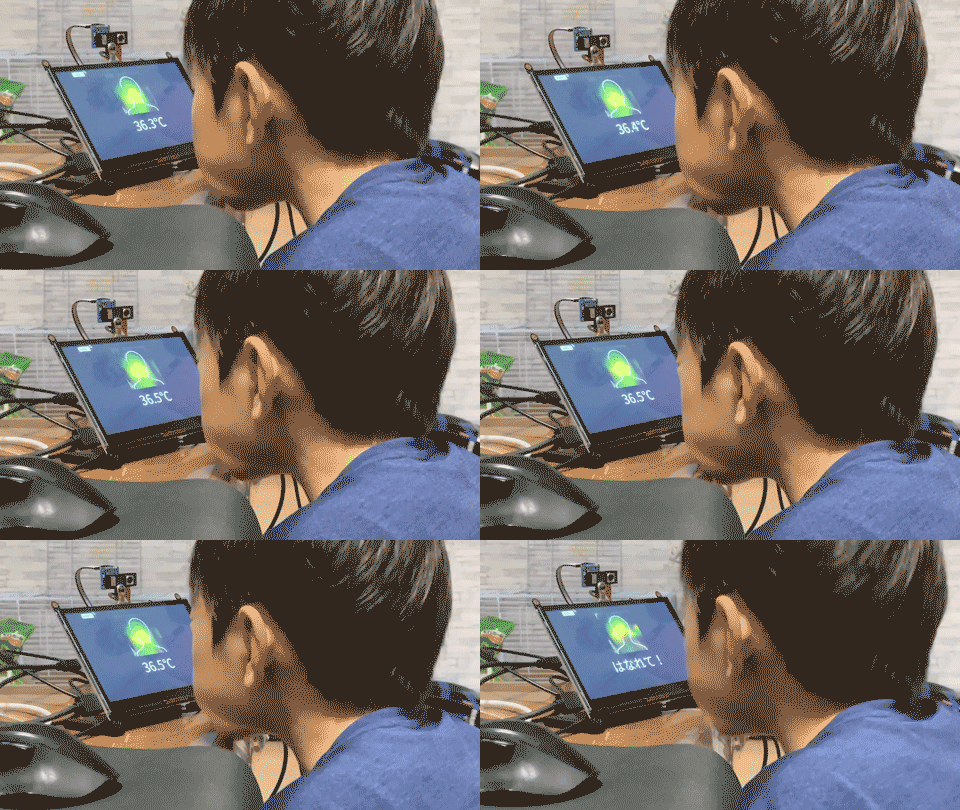
先に動作サンプル

カメラに顔を合わせると、体温が表示されます。
距離によって温度が変わるため、近づきすぎると「はなれて!」と警告がでます。
開発環境
ハード
Raspberry Pi 3 model B+
スイッチサイエンス「AMG8833」モジュール
Webカメラ「OV5640」モジュール
ソフト
OS:raspbian 10.7
Python 3.7.3
Node.js 10.21.0
Chromium 86
検温のコード
サーマルカメラで取得した温度をHTMLに読み込むまではこちらを参照。
ブラウザに表示するHTML(CSS、JavaScript)だけが、下記に変わっています。
サーモグラフィーの画像とカメラ映像をmix-blend-mode: screen;で重ねて、分かりやすく表示しています。
|
1 2 3 4 5 6 7 8 9 10 11 12 13 14 15 16 17 18 19 20 21 22 23 24 25 26 27 28 29 30 31 32 33 34 35 36 37 38 39 40 41 42 43 44 45 46 47 48 49 50 51 52 53 54 55 56 57 58 59 60 61 62 63 64 65 66 67 68 69 70 71 72 73 74 75 76 77 78 79 80 81 82 83 84 85 86 87 88 89 90 91 92 93 94 95 96 97 98 99 100 101 102 103 104 105 106 107 108 109 110 111 112 113 114 115 116 117 118 119 120 121 122 123 124 125 126 127 128 129 130 131 132 133 134 135 136 137 138 139 140 141 142 143 144 145 146 147 148 149 150 151 152 153 154 155 156 157 158 159 160 161 162 163 164 165 166 167 168 169 170 171 172 173 174 175 176 177 178 179 180 181 182 183 184 185 186 187 188 189 190 191 192 193 194 195 196 197 198 199 200 201 202 203 204 205 206 207 208 209 210 211 212 213 214 215 216 217 218 219 220 221 222 223 224 225 226 227 228 229 230 |
<html> <head> <title>サーマルカメラ</title> <script src="//ajax.googleapis.com/ajax/libs/jquery/3.2.1/jquery.min.js"></script> <script src="//cdnjs.cloudflare.com/ajax/libs/socket.io/3.1.0/socket.io.js"></script> <style> body { background-color: #000; } body.alert { background-color: #900; } #temp { position: absolute; top: 300px; left: 0; right: 0; margin: auto; font-size: 72px; color: #EEE; text-align: center; line-height: 1; } #thermalArea { display: flex; justify-content: center; align-items: center; } #thermalArea div { position: relative; width: 240px; height: 240px; overflow: hidden; } #thermalArea img { position: absolute; top: 0; left: 0; width: 100%; height: 100%; opacity: 0.8; } #canvas { position: relative; transform: scale(30); transform-origin: top left; z-index: -1; mix-blend-mode: screen; } #camera { position: absolute; top: 0; left: -40px; z-index: -2; } </style> </head> <body> <main> <button type="button" id="thermalBtn">検温!</button> <div id="thermalArea"> <div> <canvas id="canvas" width="8" height="8"></canvas> <video id="camera" width="320px"></video> <img src="img/silhouette.png" alt=""> </div> </div> <div id="temp"></div> </main> <script> // サーモグラフィー彩度・明度設定 const maxH = 250; const minH = 0; const stepH = 7; const maxL = 50; const minL = 20; const stepL = 7; // 体温判定 const minTemp = 36; const alertTemp = 37; const socket = io(); const video = document.getElementById('camera'); const canvas = document.getElementById('canvas'); const ctx = canvas.getContext('2d'); const $body = $('body'); const $thermalBtn = $('#thermalBtn'); const $temp = $('#temp'); let temp = 0; let calibration = 9; let isTemp = false; let isNear = false; let tempList = []; const init = () => { setSocket(); setBtn(); }; const setSocket = () => { let array, result = []; socket.on('thermal', (data) => { drawCanvas(data); }); }; const setBtn = () => { let timer; $thermalBtn.on('click', function(){ const emitThermal = function(){ socket.emit('msg', 'thermal'); }; isTemp = !isTemp; if(isTemp){ setCamera(); emitThermal(); timer = setInterval(emitThermal, 250); $thermalBtn.text('計測中…'); }else{ stopCamera(); clearInterval(timer); $thermalBtn.text('検温!'); } return false; }); }; const drawCanvas = (data) => { let h, l, t = 0, count = 0; for (let i = 0; i < data.length; i++) { for (let j = 0; j < data[i].length; j++) { // 最大温度記録 if(data[i][j] > t){ t = data[i][j]; // 体温ヒット数をカウント if(t + calibration > minTemp){ count++; // 2画素越えると近すぎ if(count > 2){ isNear = true; }else{ isNear = false; } } } // 色相を設定 h = maxH - data[i][j] * stepH; if(maxH < h){ h = maxH; }else if(minH > h){ h = minH; } // 明度を設定 l = (data[i][j] - minL) * stepL; if(maxL < l){ l = maxL; } ctx.fillStyle = 'hsl('+ h +', 100%, '+ l +'%)'; ctx.fillRect(j, i, 1, 1); } } tempList.push(t); if(tempList.length > 10){ tempList.shift(); } // 体温中央値を取得して判定 temp = getTemp(tempList); if(isNear){ $temp.text('はなれて!'); }else if(temp < minTemp){ //$temp.text(''); $temp.text(temp.toFixed(1) + '℃');// 低い温度でも表示 }else{ // 体温なら温度表示して平熱判定 $temp.text(temp.toFixed(1) + '℃'); if(temp < alertTemp){ $body.removeClass('alert'); }else{ $body.addClass('alert'); } } }; const getTemp = (tempList) => { // 中央値の温度を返す let array = tempList.slice(), val; array.sort((a, b) => { return a - b; }); let half = Math.floor(array.length / 2); if (array.length % 2) { val = array[half]; } else { val = (array[half - 1] + array[half]) / 2; } //キャリブレーション val += calibration; return val; }; const setCamera = () => { // カメラ起動 const constrains = { video: {width: 320, height: 240}, audio: false }; navigator.mediaDevices.getUserMedia(constrains) .then(function(stream) { video.srcObject = stream; video.play(); }); }; const stopCamera = () => { // カメラ停止 const tracks = video.srcObject.getTracks(); tracks.forEach(track => { track.stop(); }); video.srcObject = null; }; init(); </script> </body> </html> |
検温していると±1℃くらいブレるので、キャリブレーションがまだ必要です。
体温で±1℃は、でかすぎます。
カメラに近づくほど温度の精度が高まるので、至近距離で検温するように調整し直した方がよさそうです。
カメラ映像があればJavaScriptでも顔認識はできるので、距離もある程度推定できます。
もう少し調整しましょう。
